Sequence Command
This section assumes you are very familiar with the concepts, terms and ideas for protograf as presented in the Basic Concepts , that you understand all of the Additional Concepts and that you’ve created some basic scripts of your own using the Core Shapes.
This is part of the set of commands use for Layouts.
Overview
The Sequence() command is designed to lay out a number of values - letters or numbers, or shapes - in a straight line.
Apart from the Sequence() command described here, there are also these
other commands which allow you to layout elements in a more repetitive or
regular way within a page:
Usage
The Sequence() command accepts the following properties:
shape - this is one of the core shapes available, for example, a circle or rectangle; the properties of that shape will determine where the first one in the sequence is drawn; the shape should always be specified with a lowercase initial so that the
Sequence()can handle the drawing.setting - [1] this can be a set i.e. a number of values enclosed in (…) round brackets; representing these attributes required to construct the sequence:
start - the value the sequence starts with
end - the value the sequence ends with
increment - the difference between one value and next — if negative, the values decrease
type - the sequence can be letter, number, roman, or excel
setting - [2] alternatively, the setting can be specified by providing a list of values (using square
[...]brackets); these are drawn in the order provided and can be a mix of letters or numbersinterval_x and interval_y - [1] the distance between the centre of each shape that is drawn, starting from the location of the first as the reference point; negative numbers means the distances are to the left and up (rather than to the right and down)
interval_x and interval_y - [2] a list of values representing the incremental distance between the centre of each shape that is drawn, starting from the location of the first as the reference point; negative numbers means the distances are to the left and up (rather than to the right and down)
Properties
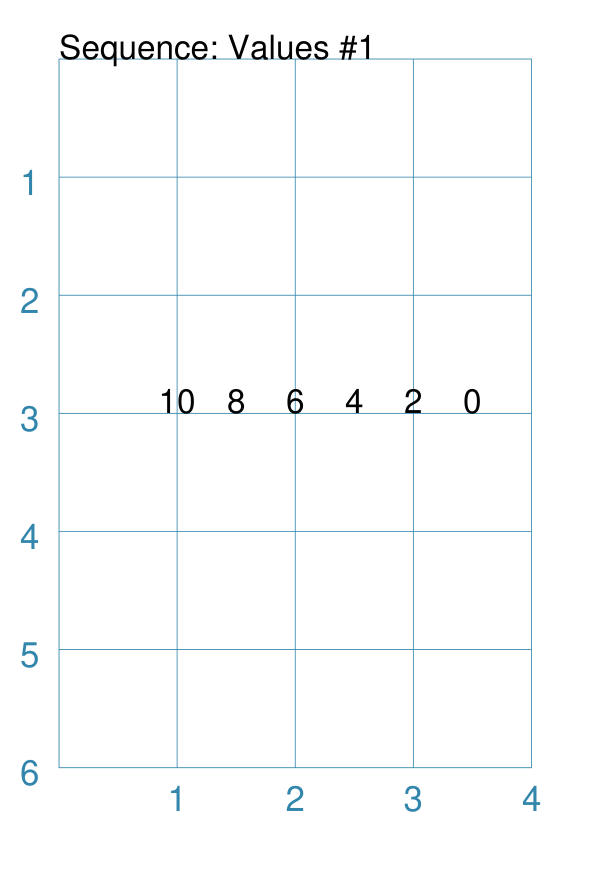
Example 1. Sequence Numbers
|
This example shows how the This example with normal integer numbers is created by: Sequence(
text(x=1, y=3),
setting=(10, 0, -2, 'number'),
interval_x=0.5,
)
Here the progression is one of numbers. The range starts at The first shape is drawn at The shapes drawn will be in a level line, because the default
|
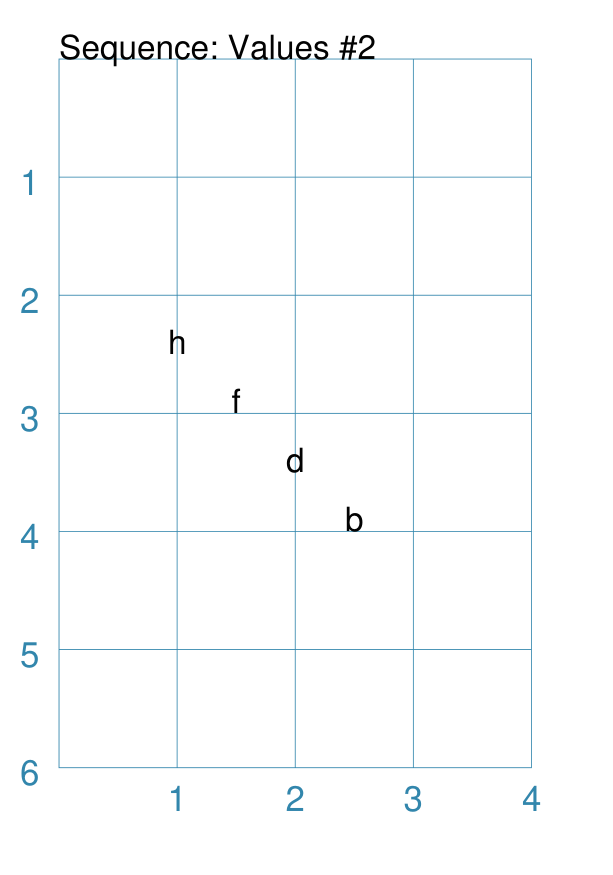
Example 2. Sequence Lowercase
|
This example shows how the This example with lowercase letters is created by: Sequence(
text(x=1, y=2.5),
setting=('h', 'b', -2, 'letter'),
interval_y=0.5,
interval_x=0.5,
)
Here the progression is one of letters. The letters will be lowercase because the start letter — The sequence ends with a The sequence will use every second letter because the interval value
is set to After the first shape is drawn, each following shape will
be |
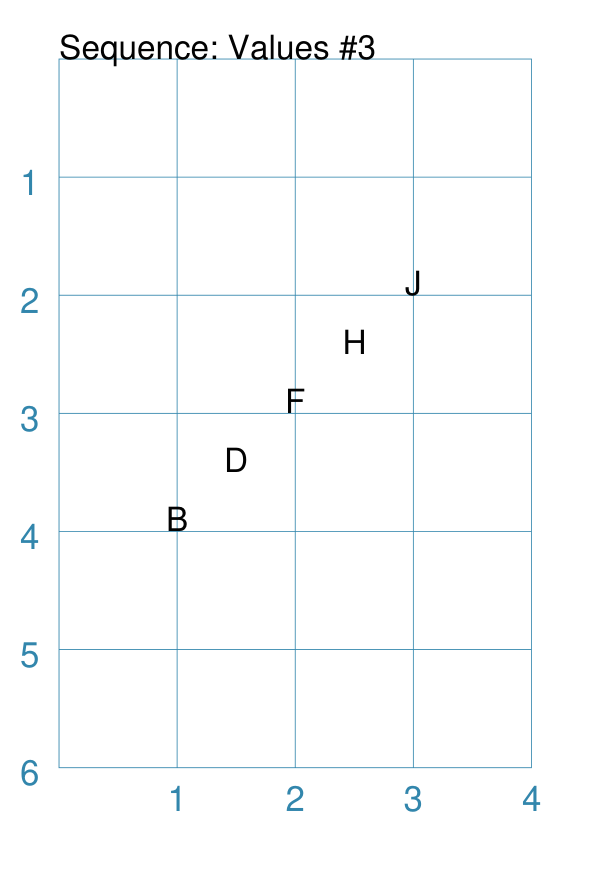
Example 3. Sequence Uppercase
|
This example shows how the This example with uppercase letters is created by: Sequence(
text(x=1, y=4),
setting=('B', 'J', 2, 'letter'),
interval_y=-0.5,
interval_x=0.5,
)
Here the progression is one of uppercase letters because the start letter
is After the first shape is drawn, each following shape will be
|
Example 4. Sequence Roman
|
This example shows how the This example with Roman numerals is created by: Sequence(
text(x=0.5, y=3),
setting=(5, 11, 1, 'roman'),
interval_x=0.5,
)
Here the progression is one of Roman numbers. The range starts at |

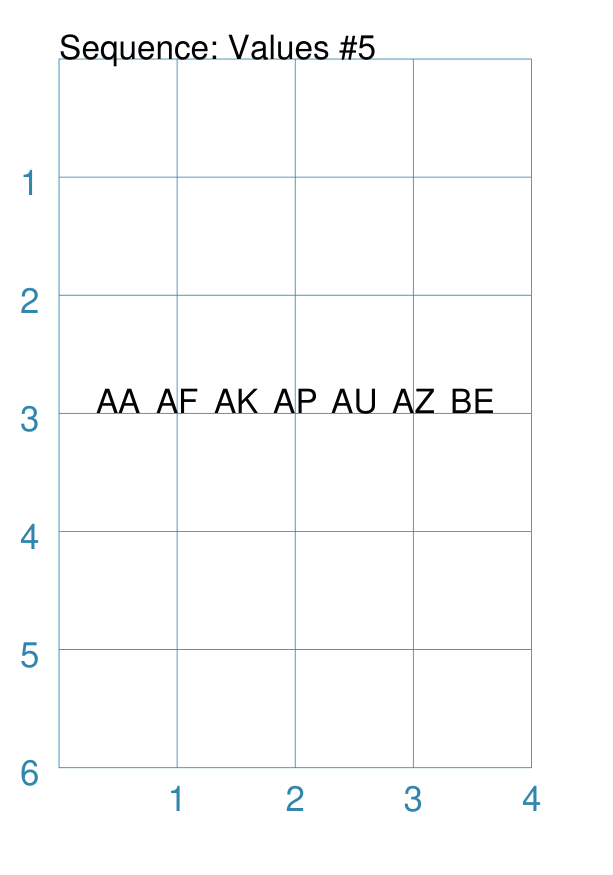
Example 5. Sequence Excel
|
This example shows how the This example with Excel columns is created by: Sequence(
text(x=0.5, y=3),
setting=(27, 52, 5, 'excel'),
interval_x=0.5,
)
Here the progression is one of Excel column headers. The value ranges from:
to:
The values make use of letter pairs from every |
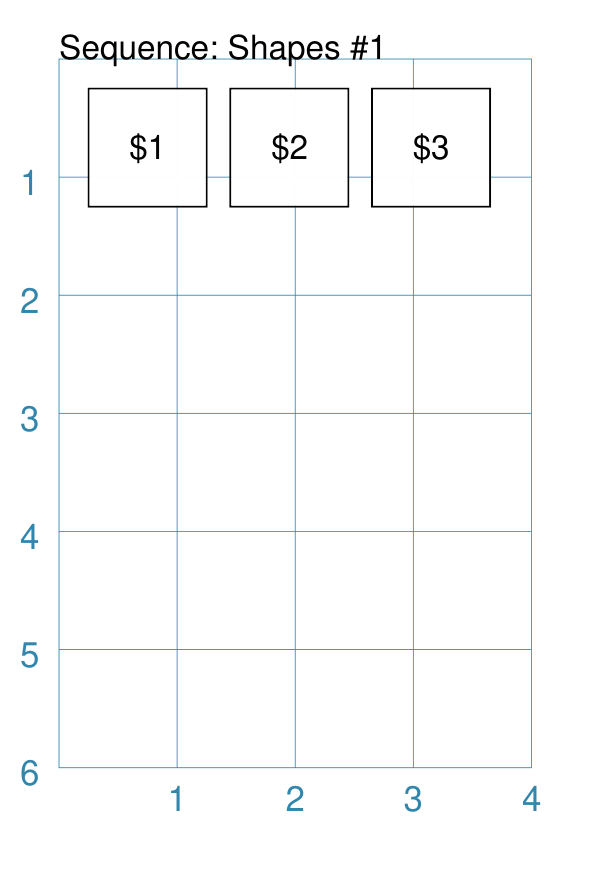
Example 6. Sequence Shapes - Label
|
In this example, values in the sequence are being assigned
to a text-based property using the special The keyword is replaced by the actual value of the sequence number for the item. This example with rectangles is created by: Sequence(
rectangle(
x=0.25, y=0.25, height=0.75, width=1,
label_size=8,
label="${{sequence}}"),
setting=(1, 3, 1, 'number'),
interval_x=1.2,
)
Here the progression is one of numbers. Each number in the sequence is assigned to the |
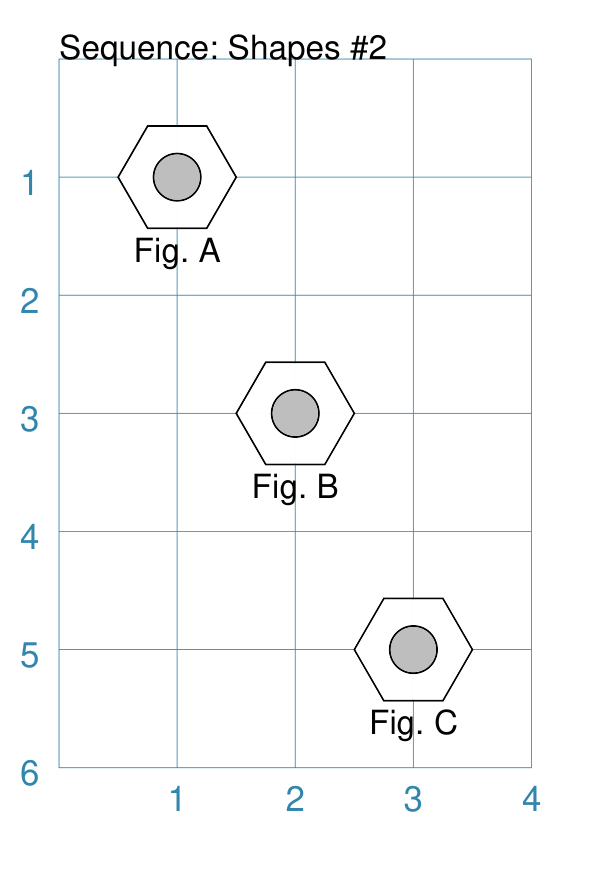
Example 7. Sequence Shapes - Multiple
|
In this example, values in the sequence are being assigned
to a text-based property using the special The keyword is replaced by the actual value of the sequence number for the item. This example with hexagons and circles is created by: Sequence(
[hexagon(
cx=1, cy=1, radius=0.5,
title_size=8,
title="Fig. {{sequence}}"),
circle(
cx=1, cy=1, radius=0.2,
fill="gray")],
setting=('A', 'C', 1),
interval_y=1.5,
interval_x=0.5,
)
Here the progression is one of uppercase letters (start letter is Note that the letter value is missing from the setting; this is because the type of value can be inferred from the start and end values. Each letter in the sequence is assigned to the This example also shows how multiple shapes can be drawn at the same time
with a single Instead of supplying a single shape, provide two or more in a list
(enclosed with square brackets As always the shapes are drawn in order — the hexagon first and then the grey circle — downwards and to the right (positive intervals). |
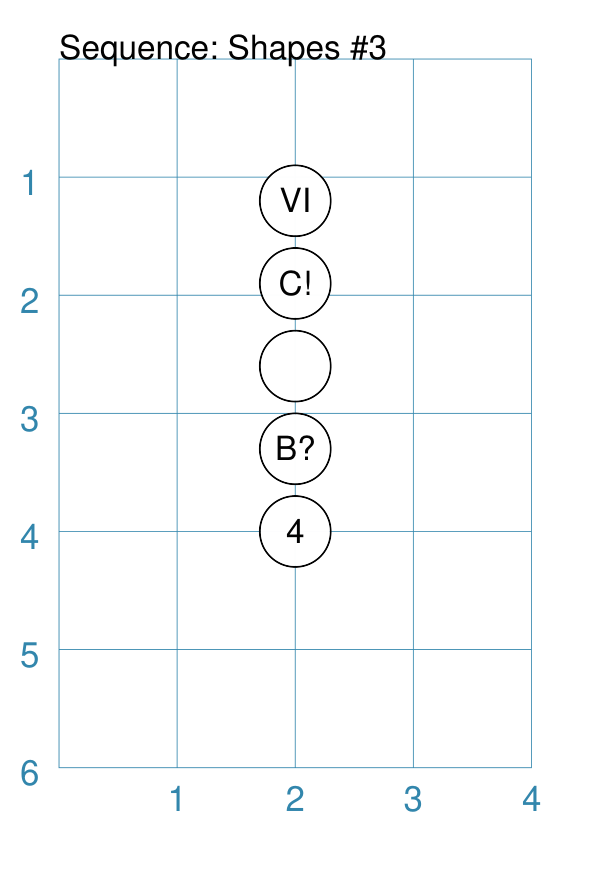
Example 8. Sequence Shapes - Setting #1
|
In this example, values in the sequence are being assigned
to a text-based property using the special The keyword is replaced by the actual value of the sequence number for the item. This example with circles is created by: Sequence(
circle(
cx=2, cy=4, radius=0.3,
label="{{sequence}}"),
setting=[4, 'B?', '', 10, 'VI'],
interval_y=-0.7,
)
Here the setting is a specific list of values. The settings items are separated by commas between the square brackets
from In this case, the list is a mixture of letters and numbers; which are
assigned as part of the Note The |
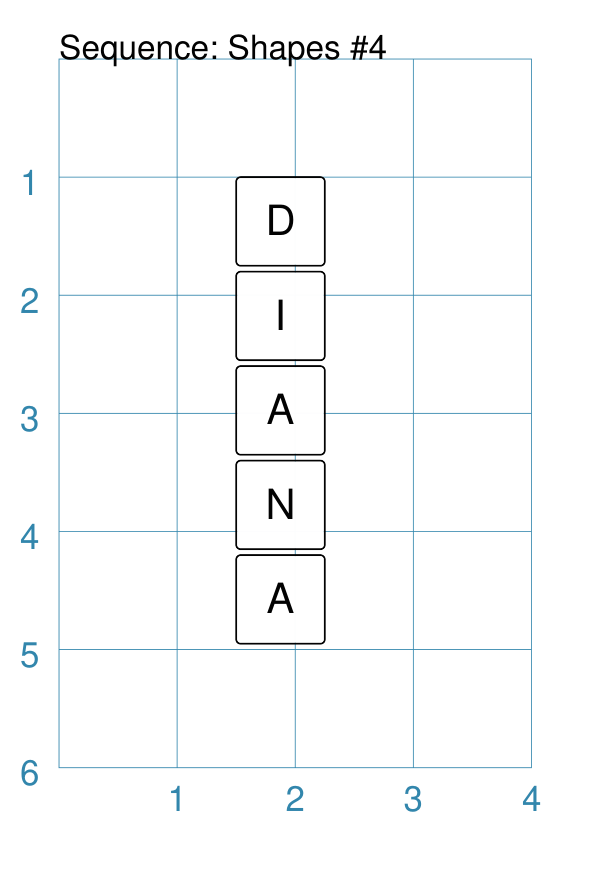
Example 9. Sequence Shapes - Setting #2
|
In this example, values in the sequence are being assigned
to a text-based property using the special The keyword is replaced by the actual value of the sequence number for the item. This example with squares is created by: Sequence(
[square(
x=1.5, y=1, side=0.5,
rounded=True,
label_size=8,
label ="{{sequence}}")],
setting=list('DIANA'),
interval_y=0.6,
interval_x=0.0,
)
Here the setting values are generated by a Python function called
|
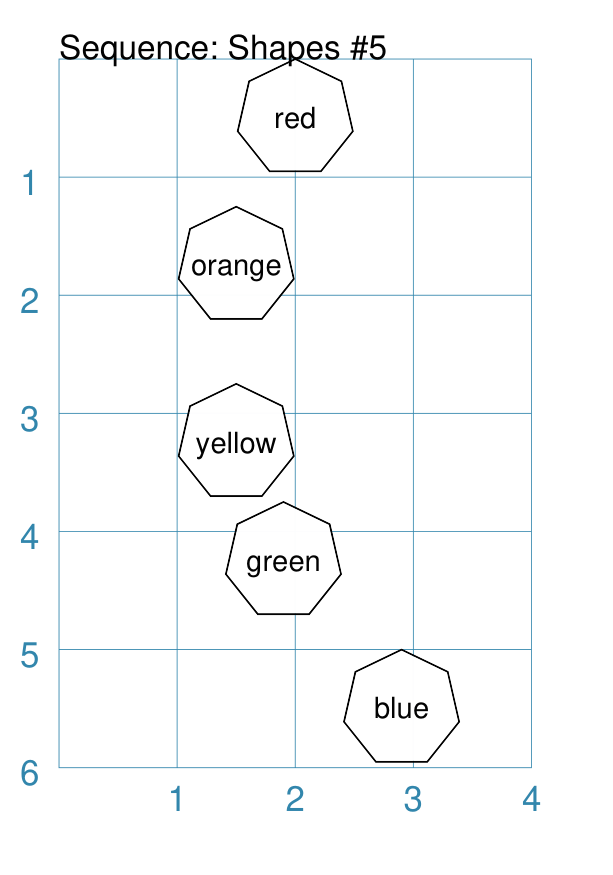
Example 10. Sequence Shapes - Intervals
|
In this example, values in the sequence are being assigned
to a text-based property using the special The keyword is replaced by the actual value of the sequence number for the item. This example with polygons is created by: Sequence(
[polygon(
cx=2, cy=0.5,
sides=7, radius=0.5,
label_size=7,
label="{{sequence}}")],
setting=[
"red", "orange", "yellow",
"green", "blue"],
interval_y=[1.25, 1.5, 1, 1.25, 0.75],
interval_x=[-0.5, 0.0, 0.4, 1.0, 2.0],
)
Here the setting is a list of words; these are assigned to the
The interval_y and interval_x properties are set as a list of incremental values; these are used to position the shape at defined x- and y-positions on a page. The result is to allow more flexibility over where items in the sequence will be placed. |