HexHex Grids
This section assumes you are very familiar with the concepts, terms and ideas for protograf as presented in the Basic Concepts , that you understand all of the Additional Concepts and that you’ve created some basic scripts of your own using the Core Shapes.
It will also be helpful to have seen and understood the concepts presented in the section on Repetitive Elements and to be familiar with the use and customisation of a Hexagon shape.
Overview
HexHex — or “beehive” — grids are widely used as grids for abstract board games.
A HexHex grid is really a more specialised version of a Hexagonal grid; but is different in terms of its available — and underlying — properties, and in the ways it can be customised.
Although the grid is hexagonal, and the default shape which appears on the grid intersections is a Hexagon sized so as to create a seamless array of hexagons, any shape which has a defined centre point can be specified for placement on the grid intersections.
Some examples of HexHex grids for games are shown in the section on abstract boards.
HexHex Grid Properties
A HexHex grid has the following key properties:
cx and cy - set the centre position of the grid; defaults to
1cm for eachrings - sets the number of rings around the centre hexagon; defaults to
1— rings increase sequentially as the grid grows largerorientation - set to either
flat(the default) orpointyto set the orientation of the centre hexagon around which others are drawnshape - sets the shape to be drawn on all grid points; defaults to a hexagon
shapes - sets a list of
(ring, [shapes..])to be drawnshow_sequence - set the label for each grid point shape to match the sequence number (starting from zero at the centre)
show_counter - set the label for each grid point shape to match the counter number (starting from
1for each new ring)
Grid points — or intersections — are defined as the centre points of “virtual” hexagons; these can be defined in the same way as a normal Hexagon i.e. by:
height - sets the distance from flat-edge to flat-edge
radius - sets the distance from centre to a vertex
diameter - sets the distance from vertex to an opposite vertex
Gridlines
In addition to the above properties, the intersections can be joined to create a series of gridlines.
To activate the grid, set the property gridlines=True
Additional styling can be set for the gridlines:
gridlines_fill - set the color for the interior area of the grid
gridlines_stroke - set the color for the lines
gridlines_stroke_width - set the lines thickness
gridlines_dashed - activate the dashed styling for the lines, if set to
True
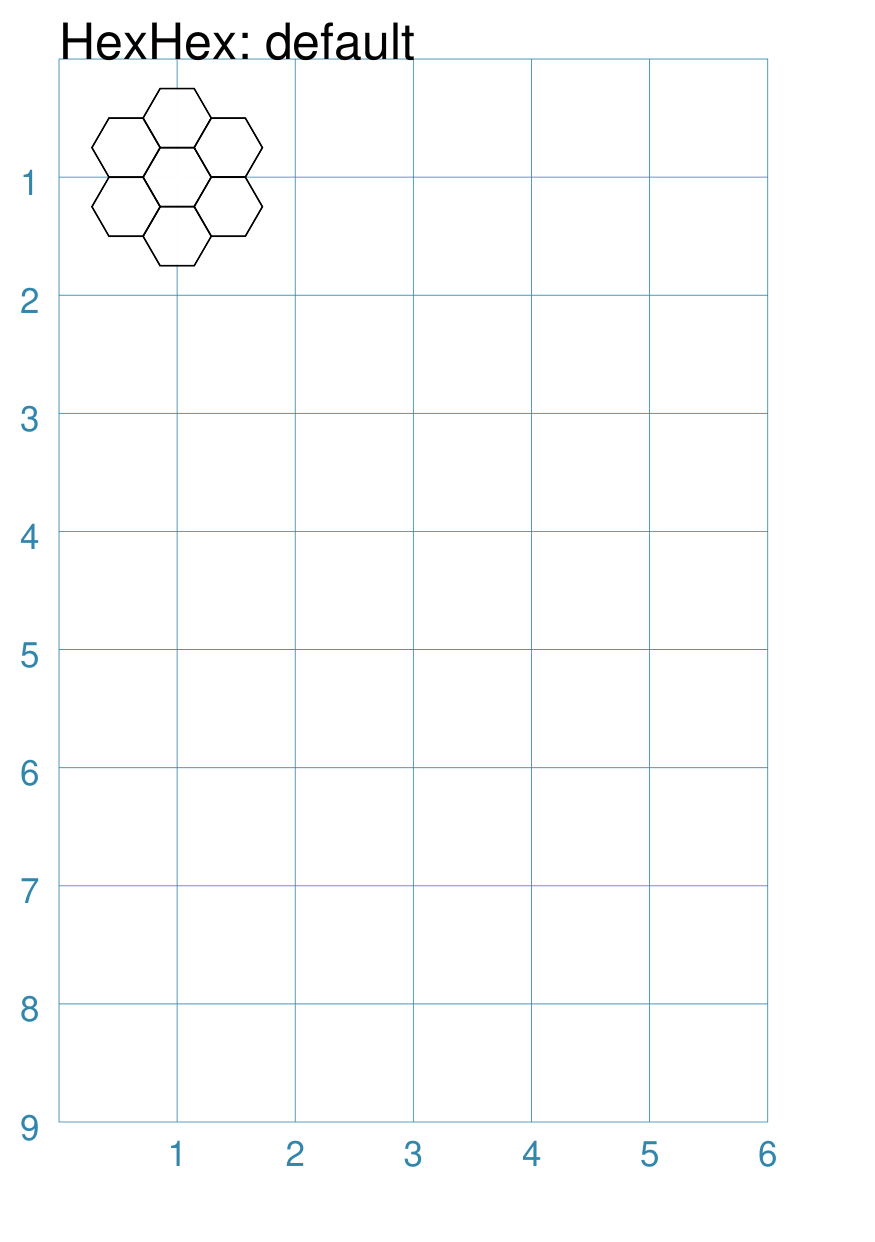
Default HexHex Grid
The basic hexagonal grid is laid out in a rectangular fashion. It can be customised in a number of ways.
|
This example shows a grid constructed using the command: HexHex(height=0.5)
It has the following properties that differ from the defaults:
|
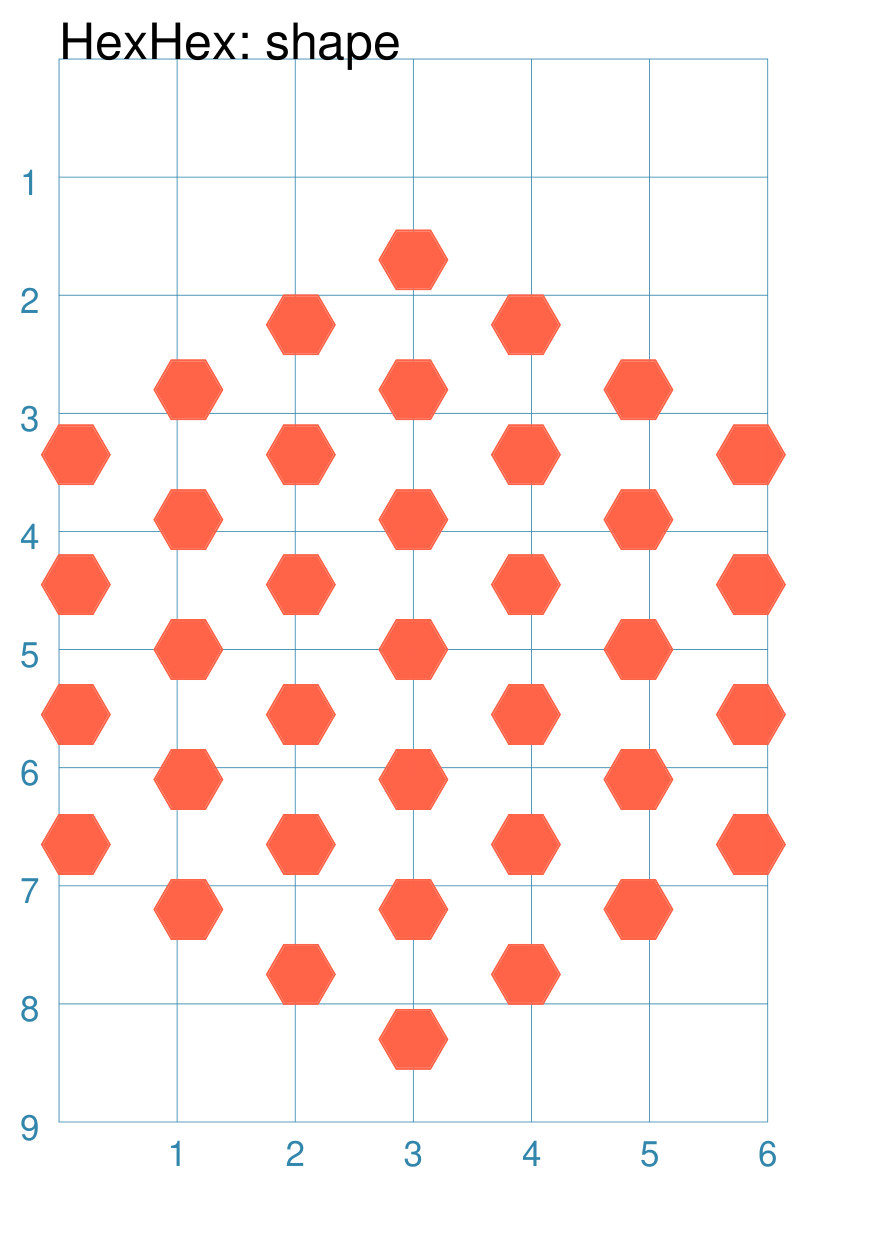
HexHex Grid with a Shape
A HexHex grid can
|
This example shows a grid constructed using the command: HexHex(
cx=3, cy=5,
height=1.2,
rings=3,
shape=hexagon(
height=0.5,
fill_stroke="tomato")
)
It has the following properties that differ from the defaults:
|
|
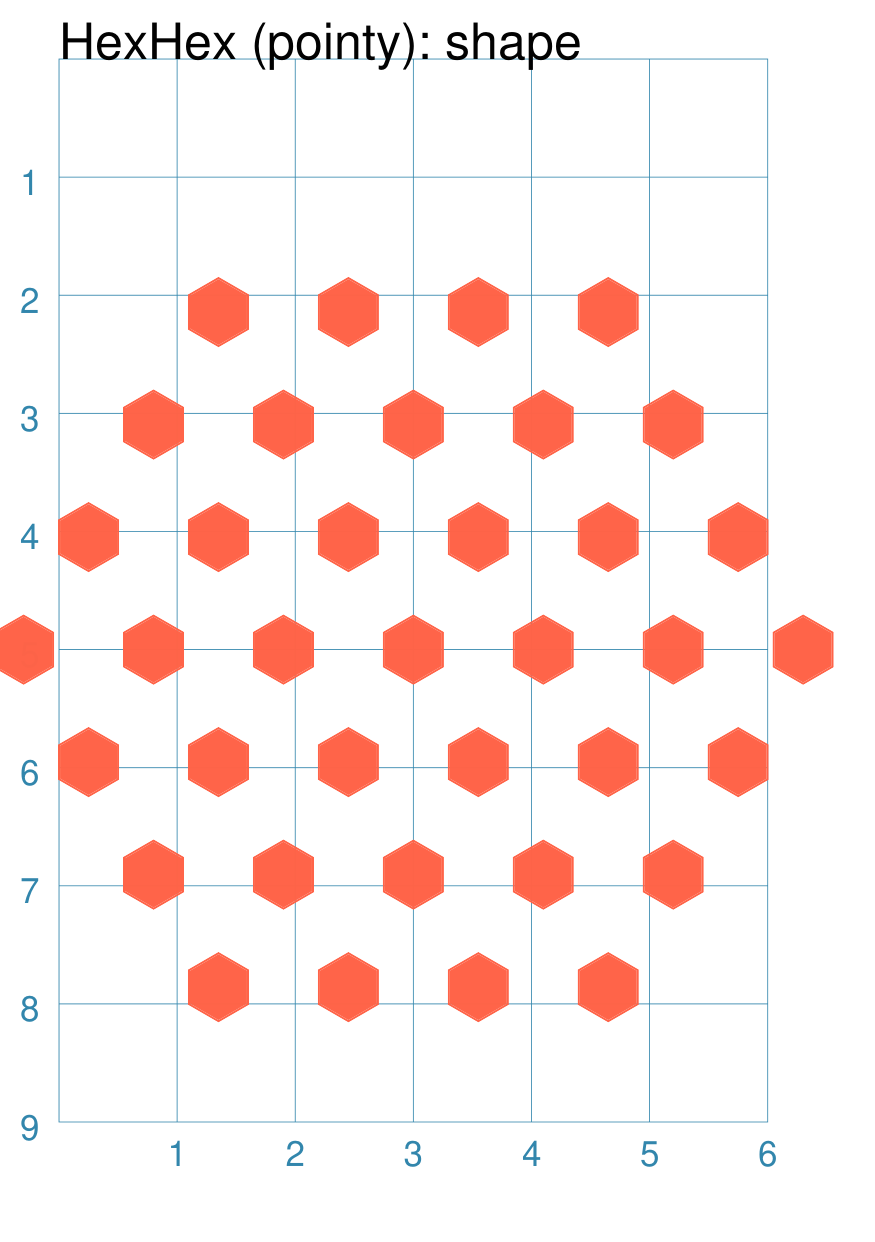
This example shows a grid constructed using the command: HexHex(
cx=3, cy=5,
height=1.1,
rings=3,
orientation="pointy",
shape=hexagon(
height=0.5,
fill_stroke="tomato",
orientation="pointy")
)
It has the following properties that differ from the defaults:
|
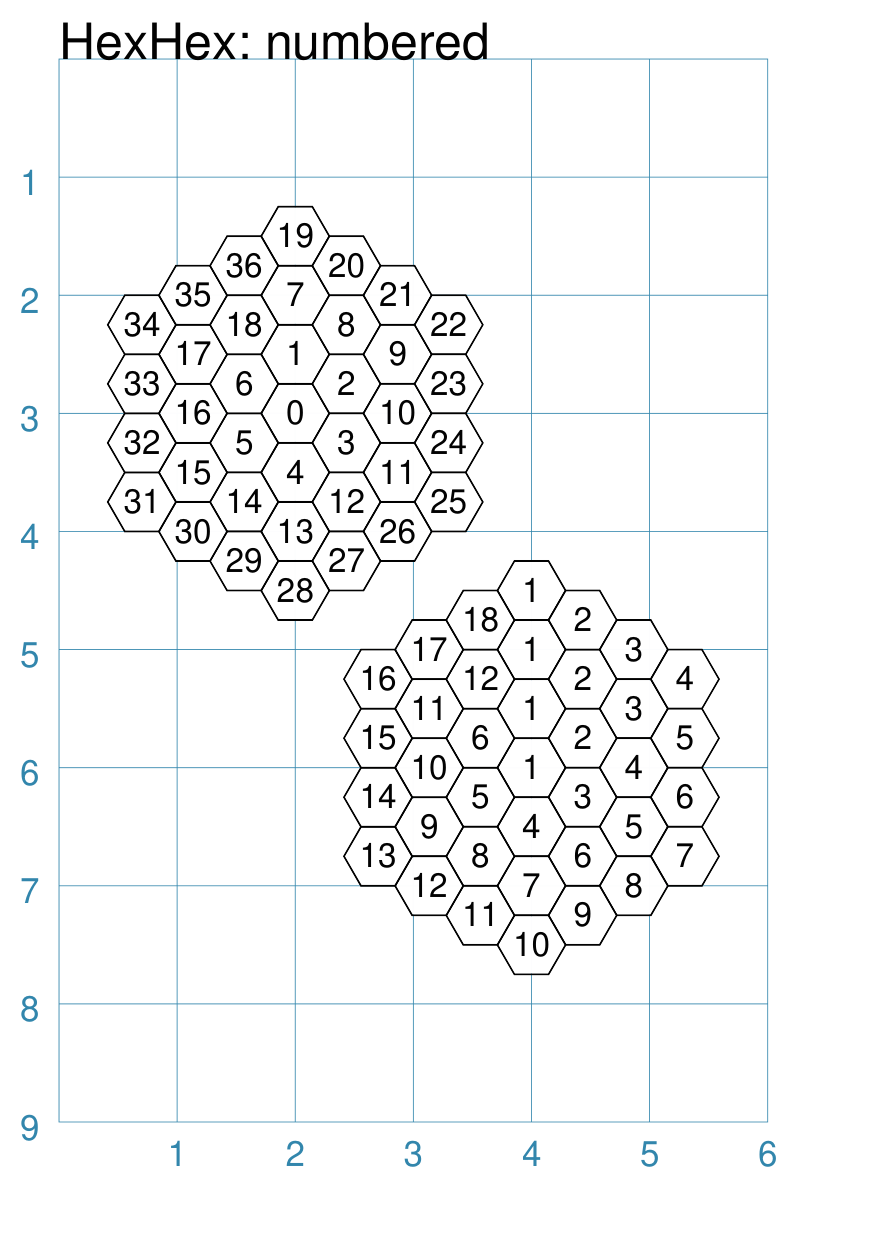
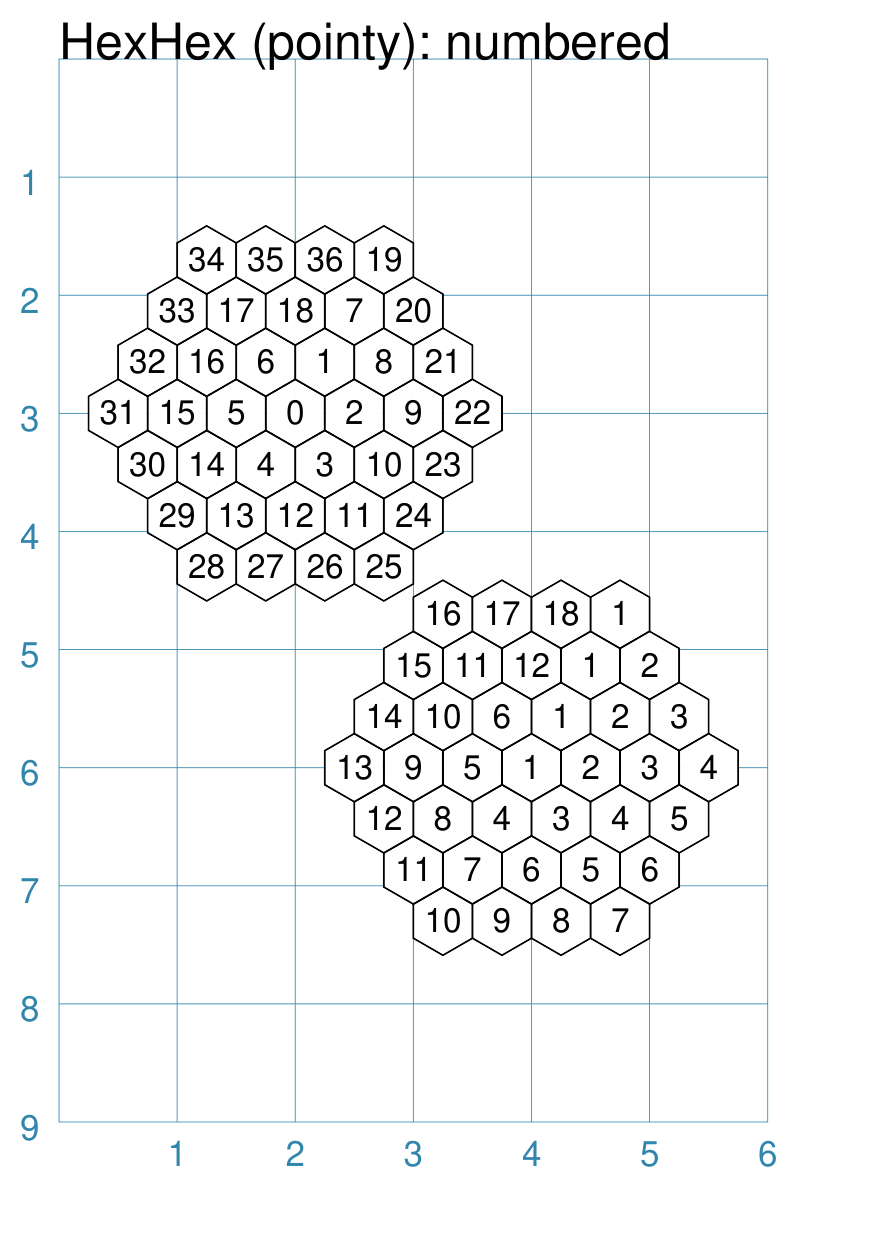
HexHex Grid with Numbers
|
This example shows a grid constructed using the command: HexHex(
cx=2, cy=3,
height=0.5,
rings=3,
show_sequence=True)
HexHex(
cx=4, cy=6,
height=0.5,
rings=3,
show_counter=True)
The upper grid has the following properties that differ from the defaults:
The lower grid has the following properties that differ from the defaults:
|
|
This example shows a grid constructed using the command: HexHex(
cx=2, cy=3,
height=0.5,
rings=3,
orientation="pointy",
show_sequence=True)
HexHex(
cx=4, cy=6,
height=0.5,
rings=3,
orientation="pointy",
show_counter=True)
The upper grid has the following properties that differ from the defaults:
The lower grid has the following properties that differ from the defaults:
|
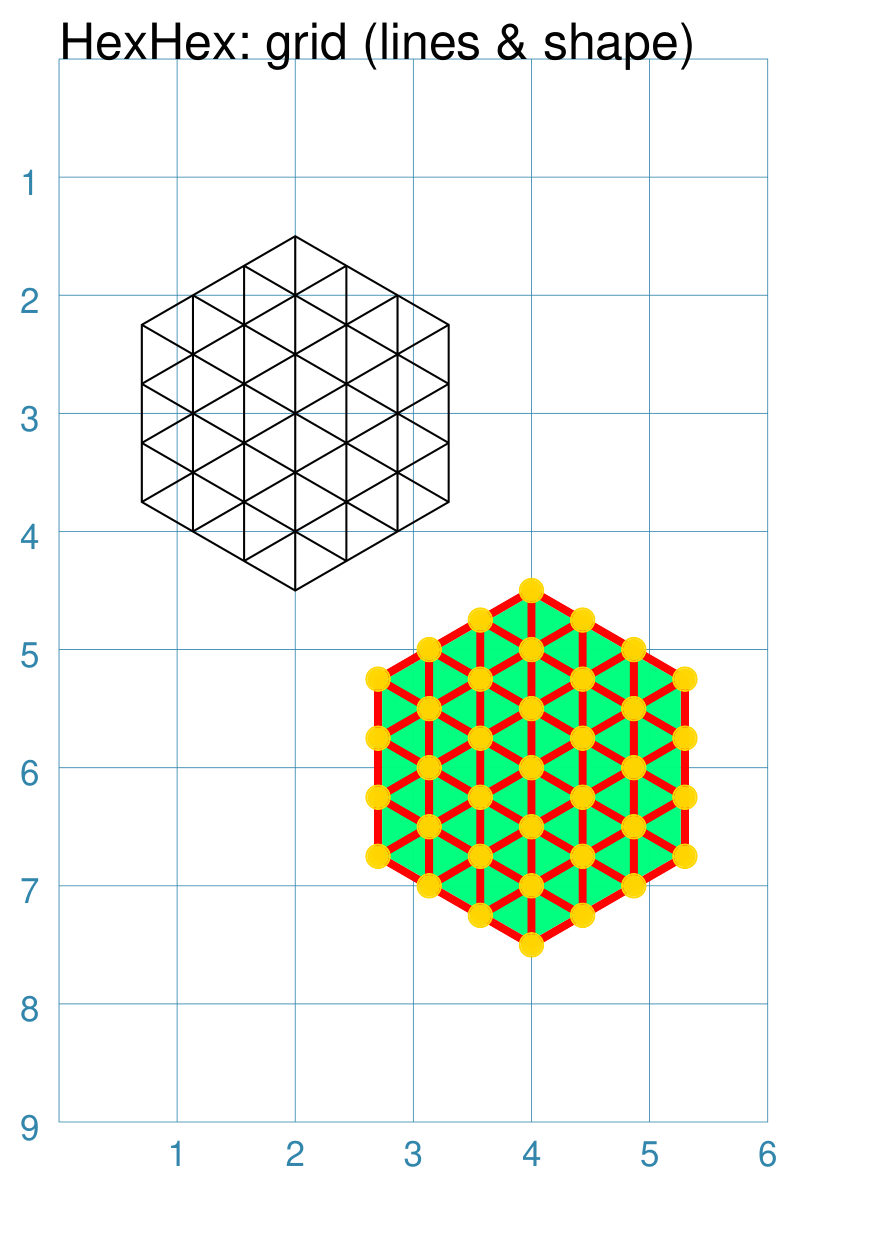
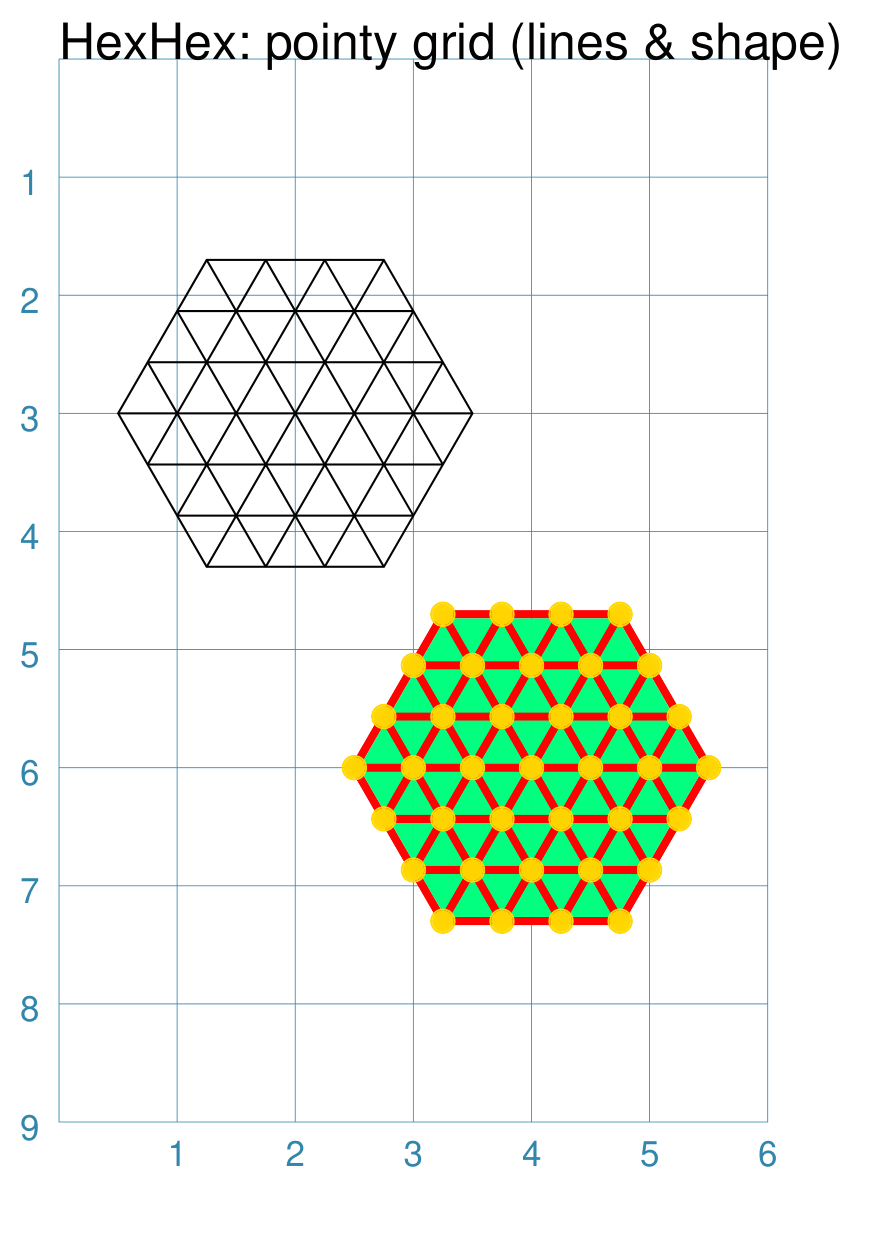
HexHex Grid with Lines
|
This example shows a grid constructed using the command: HexHex(
cx=2, cy=3,
height=0.5,
rings=3,
fill=None,
shape=None, # grid only!
gridlines=True)
HexHex(
cx=4, cy=6,
height=0.5,
rings=3,
shape=circle(
radius=0.1,
fill_stroke="gold"),
gridlines=True,
gridlines_fill="springgreen",
gridlines_stroke="red",
gridlines_stroke_width=2)
The upper grid has the following properties that differ from the defaults:
The upper grid also sets The lower grid has the following properties that differ from the defaults:
The lower grid also adds additional styling for the grid: its fill color; the stroke color for the lines; and the stroke_width for the gridlines thickness. |
|
This example shows a grid constructed using the command: HexHex(
cx=2, cy=3,
height=0.5,
rings=3,
orientation="pointy",
fill=None,
shape=None, # grid only!
gridlines=True)
HexHex(
cx=4, cy=6,
height=0.5,
rings=3,
orientation="pointy",
shape=circle(
radius=0.1,
fill_stroke="gold"),
gridlines=True,
gridlines_fill="springgreen",
gridlines_stroke="red",
gridlines_stroke_width=2)
The upper grid has the following properties that differ from the defaults:
The upper grid also sets The lower grid has the following properties that differ from the defaults:
The lower grid also adds additional styling for the grid: its fill color; the stroke color for the lines; and the stroke_width for the gridlines thickness. |
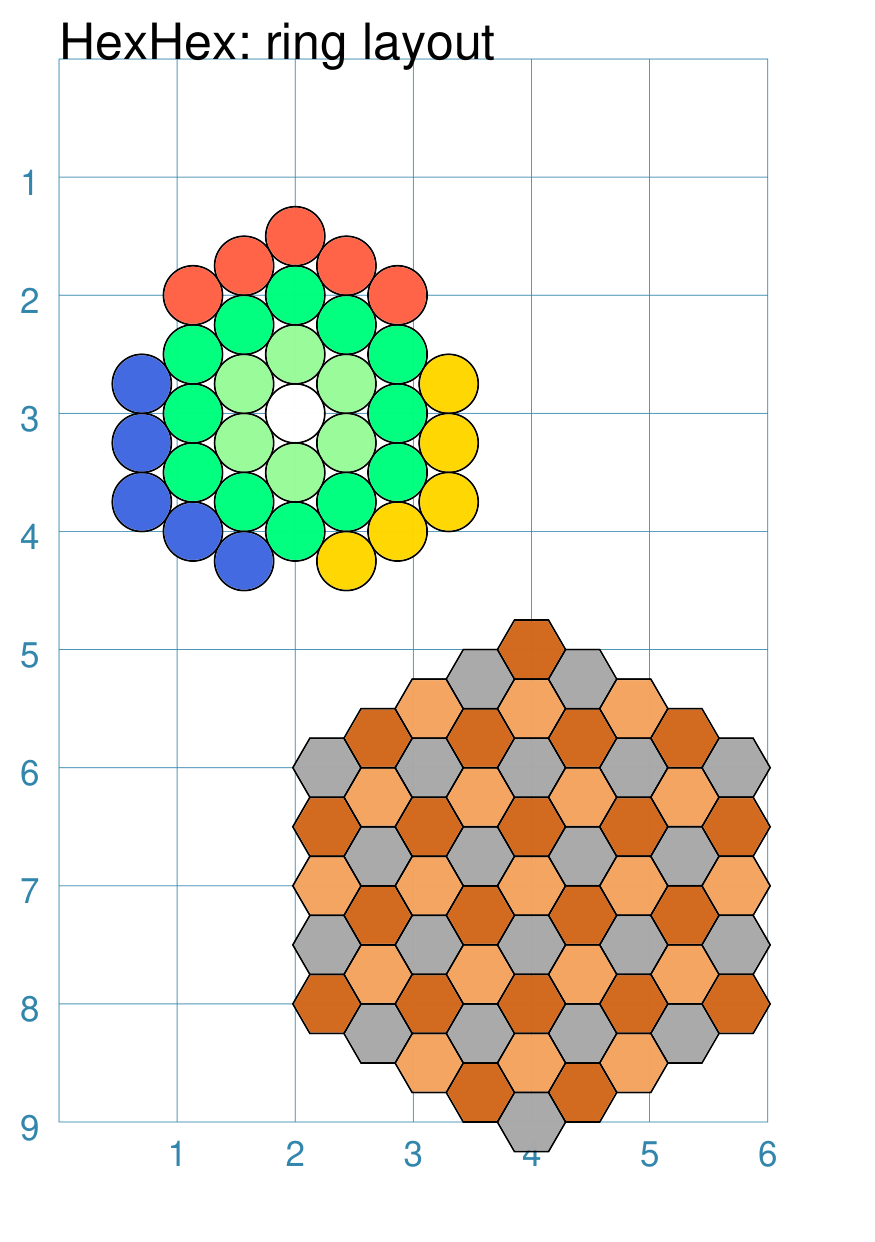
HexHex Grid with Ring Layout
|
This example shows a grid constructed using the command: wcirc = circle(radius=0.25, fill="white")
pcirc = circle(radius=0.25, fill="palegreen")
scirc = circle(radius=0.25, fill="springgreen")
tcirc = circle(radius=0.25, fill="tomato")
gcirc = circle(radius=0.25, fill="gold")
bcirc = circle(radius=0.25, fill="royalblue")
HexHex(
cx=2, cy=3,
rings=4,
height=0.5,
shapes=[
(0, [wcirc]),
(1, [pcirc]*6),
(2, [scirc]*12),
(3, [tcirc]*3 + [None] +
[gcirc]*5 + [None] +
[bcirc]*5 + [None] +
[tcirc]*2),]
)
Gr = hexagon(height=0.5, fill="darkgray")
Br = hexagon(height=0.5, fill="chocolate")
Yl = hexagon(height=0.5, fill="sandybrown")
HexHex(
cx=4, cy=7,
rings=4,
height=0.5,
shapes=[
(0, [Yl]),
(1, [Br, Gr]*3),
(2, [Gr, Yl, Br, Yl]*3),
(3, [Yl, Br, Gr, Yl, Gr, Br]*3),
(4, [Br, Gr, Yl, Br, Gr, Br, Yl, Gr]*3),]
)
gridlines_stroke_width=2)
The upper grid has the following properties that differ from the defaults:
The shapes property is a list of “set” values; where each set is
a pair of values enclosed in round brackets. The first value is the
ring number and the second is a list of shapes. In this case, the
shapes are defined earlier in the script (the various colored
The lower grid has the following properties that differ from the defaults:
The shapes property is a list of “set” values; where each set is
a pair of values enclosed in round brackets. The first value is the
ring number and the second is a list of shapes. In this case, the
shapes are defined earlier in the script (the various colored
Hint Note the use of the Note also that lists can be combined to form a single list by
using a For example, |
|
This example shows a grid constructed using the command: wcirc = circle(radius=0.25, fill="white")
pcirc = circle(radius=0.25, fill="palegreen")
scirc = circle(radius=0.25, fill="springgreen")
tcirc = circle(radius=0.25, fill="tomato")
gcirc = circle(radius=0.25, fill="gold")
bcirc = circle(radius=0.25, fill="royalblue")
HexHex(
cx=2, cy=3,
rings=4,
orientation="pointy",
height=0.5,
shapes=[
(0, [wcirc]),
(1, [pcirc]*6),
(2, [scirc]*12),
(3, [tcirc]*3 + [None] +
[gcirc]*5 + [None] +
[bcirc]*5 + [None] +
[tcirc]*2),]
)
Gr = hexagon(height=0.5, fill="darkgray")
Br = hexagon(height=0.5, fill="chocolate")
Yl = hexagon(height=0.5, fill="sandybrown")
HexHex(
cx=4, cy=7,
rings=4,
orientation="pointy",
height=0.5,
shapes=[
(0, [Yl]),
(1, [Br, Gr]*3),
(2, [Gr, Yl, Br, Yl]*3),
(3, [Yl, Br, Gr, Yl, Gr, Br]*3),
(4, [Br, Gr, Yl, Br, Gr, Br, Yl, Gr]*3),]
)
gridlines_stroke_width=2)
The upper grid has the following properties that differ from the defaults:
The shapes property is a list of “set” values; where each set is
a pair of values enclosed in round brackets. The first value is the
ring number and the second is a list of shapes. In this case, the
shapes are defined earlier in the script (the various colored
The lower grid has the following properties that differ from the defaults:
The shapes property is a list of “set” values; where each set is
a pair of values enclosed in round brackets. The first value is the
ring number and the second is a list of shapes. In this case, the
shapes are defined earlier in the script (the various colored
Hint Note the use of the Note also that lists can be combined to form a single list by
using a For example, |
Other HexHex Grid Resources
There are already a number of software tools available for creating hexhex grids of various kinds and for different purposes.
HEXGRID (https://hamhambone.github.io/hexgrid/) - an online hex grid generator which interactively creates a display, downloadable as a PNG image; use “Map: Shape” of hexagon to generate a HexHex
draw_game_board (https://github.com/jpneto/draw_game_boards/tree/main) - a Python tool to translate boards and playing pieces, including HexHex boards, from an ASCII format into SVG.