Deck & Card Commands
This section assumes you are very familiar with the concepts, terms and ideas for protograf as presented in the Basic Concepts , that you understand all of the Additional Concepts and that you’ve created some basic scripts of your own using the Core Shapes.
Note
This section provides all the details, along with supporting examples, of the commands used in card creation. A high-level overview can be found in Working with Cards.
The Deck Command
This command provides the overall “framework” for the cards that are defined in the script. It’s primary purpose is to set the card size, and then calculate how many cards appear on a page. It manages the “flow” of cards as they get drawn.
The following are key properties that will usually need to be set for a
Deck:
cards - this is the number of cards appearing in the deck. It defaults to
9. (Note that other commands such asData()andMatrix()will alter this value.)height - this is the card height; it defaults to 8.89 cm / 3.5”
width - this is the card width. It defaults to 6.35 cm / 2.5”
Important
The Deck command is covered in detail, with examples of all of its
properties, in the Deck Command section.
Deck Example 1. Default Card Size
This example shows the definition of a simple deck for cards that are a commonly-used size (with the default units of centimetres in place). The card size means that there will be 9 rectangular cards on each of two A4, portait-mode, pages:
Deck(cards=18)
Note that these rectangular cards have a default height (8.89 cm) and
width (6.35 cm).
The actual number of cards may be changed by the Data Command or the Matrix Command.
Deck Example 2. Copy & Mask
This example shows the definition of a deck of 27 cards that are a default size and type (rectangular). This means that there will be 9 cards on each A4 page:
Deck(
  cards=27,
  copy="Copies",
  mask="{{ Race == 'Hobbit' }}")
For the copy property to work, it is expected that there is a column with the label Copies available in the Deck’s dataset (which is created by the Data Command); in this case, the number in that column will be used to make that many copies of the card (unless it has a mask).
For the mask property to work, it is expected that there is a column
with the label Race available in the Deck’s dataset (which is created
by the Data Command); in this case, any card with data matching the
value Hobbit will be masked (ignored and not drawn).
If you need to match any of multiple mask conditions, use an or:
mask="{{ Race == 'Hobbit' or Race == 'Dwarf' }}")
If you need to match all of multiple mask conditions, use an and:
mask="{{ Race == 'Hobbit' and Age < 39 }}")
If you need multiple mask conditions, these can be combined using an and or an or, with each grouped condition in round brackets:
mask="{{(Race == 'Hobbit' and Age < 39) or (Race == 'Human' and Age < 80)}}")
The dataset that could be used with the above Deck is shown in Data Example 5. Lists.
The full code - including the data - for this example is available as cards_lotr.py
Deck Example 3. Create a Card Gallery
Here is an example of a customised Deck command used to create an output
file that contains many cards in a single page. The Save command, in
turn will create a PNG image for each page:
Deck(
    cards=108,
    gallery=(9, 6),
)

Save(
    output='png',
    dpi=300,
)
In this example, the cards will be laid out in a gallery, or grid, of nine cards wide (“cards per row”) by six cards high (“cards per column”) — for a total of up to 54 cards per page of the PDF.
In this case, because there are 108 cards, and the Save() command has the
output property set to png, two PNG images will be created.
The size of a PNG file will depend on the dpi setting for the Save()
command.
This type of PNG image can be used as an input when creating digital card decks in programs such as TableTop Simulator (TTS).
Important
The gallery setting will override any margins that have been set
— all will be reset to 0. It will also ignore any bleed
areas or spacing between cards. Cards backs will not be laid out in
any offset fashion and the gutter will not be used.
The Card Command
This command is both simple and flexible. It allows for a complex design, with many elements — primarily shapes — to be added to one, some — or all — of the cards in a deck.
The key concept to note about a card is that its essentially a “small page”. Any x- and y-locations are therefore defined relative to the card edges and not to the page.
A Card is defined somewhat differently from other shapes in protograf in that its “properties” are not named… a typical Card command looks like:
Card("1", rectangle(), text())
Card("2-5", circle())
This format is explained in the next two sections.
Card Numbering
The first value supplied to the Card() command must be one or more
sequence numbers of the relevant cards. This value can be supplied either
as a string, or a list (numbers between square brackets [ and ]).
Note
A Card’s sequence number depends on how the data for the Deck is sourced; usually it will correspond to the order that it is read from an Excel or CSV file.
Examples of Card sequence numbers supplied as strings:
"10"- a single number; card number 10"10-20"- a range of numbers; in this case the cards numbered 10 through to 20 inclusive"5,10-20,23-27"- multiple ranges of numbers; in this card number 5, cards numbered 10 through to 20 and cards numbered 23 through to 27"*"- means any and all cards (the term"all"can also be used)
Examples of Card sequence numbers supplied as a list:
[10]- a single number; card number 10[10,11,12,13,15]- a set of numbers; in this case the cards numbered 10 through to 15, but not number 14
Card Elements
The second value, and all further values, supplied to the Card()
command must be either:
a core shape, or
one of the a supporting commands, such as a group, or
a Python function defined in the script.
There can be any number of Card() commands; and the same output card could
be targeted by multiple Card() commands, each affecting some aspect of its
appearance; as elsewhere in protograf the order of commands matter in
the sense that later commands may overwrite any elements created by earlier
ones.
Important
Be aware that when defining elements, such as shapes, that are not needed immediately, you MUST use the lowercase version of the command name; refer to the section on case sensitivity
Card Creation Example 1.
This example shows how different shapes can be assigned to cards:
dk = Deck(cards=9)

text1 = text(
    text='proto',
    xy=dk.cxy,
    font_size=18)
rc1 = rectangle(
    x=0.7, y=7.0,
    width=5, height=1.5)
line1 = line(
    xy=rc1.geo.nw,
    xy1=rc1.geo.se,
    stroke="red")

line_in_rect = group(rc1, line1)

Card('*', text1)
Card("1-3", rc1)
Card([7,8,9], line_in_rect)
Here:
all (the
*) cards get assigned the same text (in the card centre by making use of a reference to the deck’s properties throughdk.cxy)cards 1, 2 and 3 are assigned a rectangle
cards 7, 8 and 9 are assigned a group (named
line_in_rect); this group consists of a rectangle (rc1) overdrawn by a red, diagonal line (line1). The line is superimposed on the rectangle because it appears after it in the group list (see below for how the group function works.) Note that the line makes use of thegeoproperty, that many shapes have, allowing you to reference key locations on that shape.
The CardBack Command
This command mirrors its counterpart — Card Command.
Any element or option that is applicable to that command can be used; for example; adding shapes or setting ranges.
There are a few differences. Any numeric range for a CardBack cannot exceed
the number of cards — so if there were 9 Cards in the Deck, you cannot
set a range of "1-10" for a CardBack.
The default location for CardBacks to be drawn is on alternating pages on the assumption that cards will be printed back-to-back and that there are matchiing card backs for every front. The offsets for CardBack positions are changed so that the images line-up “behind” the Cards drawn on the front.
Both front and back can be drawn on the same page by using a gutter. For details on this property, see the Deck Command.
The Data Command
This command allows for a dataset — for example, a CSV file or an Excel spreadsheet — to be used as the source for values or properties of commands making the cards.
Important
The number of cards that are listed in the dataset — CSV file; Excel spreadsheet; etc. — will always take priority over the number of cards specified in the Deck Command..
Because values now have “names” they can be referenced and used by the supporting commands — this is usually the primary reason to supply a data source in this way.
Important
A dataset that the script must use should be defined before a Deck
or Countersheet command is used; otherwise you will get this error:
FEEDBACK:: Cannot use T() or S() command without Data already defined!
The Data Source Property
There are six possible types of data sources to create a dataset, and protograf uses a different property name, or set of names, for each:
A CSV or Excel file (filename)
A
Matrixcommand (matrix)A directory containing image files (images and images_list)
A “list of lists” ( data_list)
A Google Sheet (google_key, google_sheet and sheetname)
The BoardGameGeek API, which makes data available as a list-of-lists (as per 4.)
The Data command’s different property names are described below:
filename - the full path to the name (including extension) of the CSV or Excel file being used; if no directory is supplied in the path, then it is assumed to be the same one in which the script is located
sheet - refers to the ID of the Google Sheet being accessed (see the example below for more details)
matrix - refers to the name assigned to the
Matrixbeing usedimages - refers to the directory in which the images are located; if a full path is not given, its assumed to be directly under the one in which the script is located
images_list - is used in conjunction with images to provide a list of file extensions which filter which type of files will be loaded from the directory e.g.
.pngor.jpg; this is important to set if the directory contains files of a type that are not, or cannot be, useddata_list refers to the name assigned to a “list of lists” that is being used; this property is also used when linked to data being sourced from the BoardGameGeek API
google_key, google_sheet and sheetname - used to access a Google Sheet - see Data Example 6. Google Sheets
Apart from the images directory, each data source is essentially a set of rows and columns. Each row represents data that must appear on a card. Each column must be named so that the data can be referenced and used, in some way, for a card:
the names for a CSV file must appear in the first line of the file
the names for a Excel file, or Google Sheet, must appear in the columns of the first row of the spreadsheet
the names for the Matrix Command must appear as a list assigned to the labels property of the command
the names for a “list of lists” must appear in the first list in the lists
Important
The names used must only consist of normal alphabetical characters
— upper- or lower-case — and not other numbers, symbols,
punctuation marks, spaces etc. except for an underscore (_).
Hint
If you are a Python programmer, there is a final way to provide data.
Internally, all of these data sources are converted to a list of
dictionaries, whose keys all match and correspond to the column names,
so if you have this available, through any means, it can be supplied
directly to Data via a source property. The onus is on you
to ensure that the dictionary is correctly formatted.
Other Data Properties
The other properties that can be used for the Data command are:
extra - if additional cards need to be manually created for a Deck, that are not part of the data source, then the number of those cards can be specified here. See the standard playing cards example, where the primary cards are created through the Matrix Command and the two Jokers are the “extras”.
randoms - if you want to create a subset of the full set of data, then supply a whole number indicating how many random records should be created
filters - a list of
(key, value, type)filter on which the data must be filtered - see Data Example 8. Filters
Data Examples
Data Example 1. CSV
This example shows how data is sourced from a CSV file:
Data(filename="card_data.csv")
Data Example 2. Excel
This example shows how data is sourced from an Excel file:
Data(filename="card_data.xls")
Along with the filename, two other properties can be used:
sheetname - the name of sheet in the Excel file that must be used; this defaults to the first one
cells - a range of cells delimiting the data to be used; this will use a
col:rowformat, indicating a block - from the top-left cell to the bottom-right cell e.g.'A3:E12'
For example:
Data(filename="card_data.xls", sheetname="Characters", cells="B2:F13")
Data Example 3. Matrix
This example shows how data is sourced from a Matrix; in this case the data represents possible combinations for a standard deck of playing cards:
combos = Matrix(
    labels=['SUIT', 'VALUE'],
    data=[
        ['\xab', '\xa8', '\xaa', ' \xa9'],  # spade, club, heart, diamond
        ['K','Q','J','10','9','8','7','6','5','4','3','2','A'],
    ])
Data(matrix=combos)
The dataset will contain a combination of every item in the first list of data - representing the SUIT - with every item in the second list of data - representing the VALUE; so 4 suits, multiplied by 13 values, results in 52 dataset items.
For more detail on these properties see The Matrix Command.
Data Example 4. Images
This example shows how data is sourced from an image directory:
Data(
    images="pictures", images_filter=".png,.jpg")
Here the script will look for all images with a png or jpg extension,
located in the pictures subdirectory.
Data Example 5. Lists
This example shows how data is sourced from a “list of lists”:
lotr = [
    ['ID', 'Name', 'Age', 'Race', 'Copies'],
    [1, "Gimli", 140, "Dwarf", 1],
    [2, "Legolas", 656, "Elf", 1],
    [3, "Aragorn", 88, "Human", 1],
    [4, "Frodo", 51, "Hobbit", 1],
    [5, "Pippin", 29, "Hobbit", 1],
    [6, "Merry", 37, "Hobbit", 1],
    [7, "Samwise", 39, "Hobbit", 1],
    [8, "Boromir", 41, "Human", 1],
    [9, "Gandalf", None, "Maia", 1],
    [10, "RingWraith", 4300, "Nazgul", 9],
]
Data(data_list=lotr)
This list above is equivalent to a CSV file containing:
ID,Name,Age,Race,Copies
1,Gimli,140,Dwarf,1
2,Legolas,656,Elf,1
3,Aragorn,88,Human,1
4,Frodo,51,Hobbit,1
5,Pippin,29,Hobbit,1
6,Merry,37,Hobbit,1
7,Samwise,39,Hobbit,1
8,Boromir,41,Human,1
9,Gandalf,,Maia,1
10,RingWraith,4300,Nazgul,9
It can be seen that using None in the “list of lists” is equivalent
to missing item in the CSV file (for Gandalf’s age).
See below under the T(emplate) command and also under the S(election) command for examples how this data could be used.
Data Example 6. Google Sheets
There are three properties needed to gain access to data from a Google Sheet:
google_key - an API Key that you can request from Google
google_sheet - the unique ID (a mix of numbers and letters) which is randomly assigned by Google to your Google Sheet
sheetname - the name of the tab in the Google Sheet housing your data
Hint
Access to a Google Sheet is done in such a way that it is possible for empty cells to not be included in the downloaded data. In this case protograf will “fill-in” blank values.
The API Key
Getting a Google API Key is beyond the scope of this document; one method is provided by Google https://support.google.com/googleapi/answer/6158862?hl=en but be aware that such documentation may quickly get out of date.
The end result of the process should provide you a key like this:
A1_izC00Lbut2001askHAL4aPodd00rsys3rr0r
You may also need to follow the + Enable APIs and services on the Google
Cloud Dashboard (https://console.cloud.google.com/apis/dashboard) and then
select/enable the Google Sheets API from the list of services.
The Sheet ID
A Google Sheet is only accessible by you when first created. To make it allow protograf code access to the data, you must share the Google Sheet publicly.
Navigate to your Google Sheet and click on the Share button. Then ensure
that you choose Anyone with the link and set the access to View.
Click on the Copy link and save this in a document; the result should look like:
https://docs.google.com/spreadsheets/d/1vRfwxVjafnZVmgjazQKr2UQDyGYYK8GXJhQAPlzJ03o/edit
The string of characters between the /d/ and the /edit is the sheet ID.
The Sheet Name
The name of the sheet you want to access is displayed in the bottom section of
display on a tab. The default name of the first sheet is Sheet1.
This next example shows how data is sourced from a Google Sheet, once you have all the information described above:
Data(
    google_sheet="1vRfwxVjafnZVmgjazQKr2UQDyGYYK8GXJhQAPlzJ03o",
    google_key="A1_izC00Lbut2001askHAL4aPodd00rsys3rr0r",
    sheetname="Characters")
If the sheet cannot be reached, or access permissions are not correct, or the API key is invalid, then you will get an error.
Solving access errors to a Google Sheet is beyond the scope of protograf and its developers!
Note
There are limits to how many requests you can make to Google; please be aware of what your usage rights and limits are!
Data Example 7. BoardGameGeek API
This example shows how data is loaded for boardgame details obtained from the BoardGameGeek API.
boardgames = BGG(token="ABC123", ids=[1, 2, 3], progress=True)
Data(data_list=boardgames.data_list)
If your token-based access to the BoardGameGeek API works, then it returns the
game data — in this case games with ID’s 1, 2, and 3 —
and these data are assigned to the name boardgames.
The data_list required for Data can be obtained from the stored set of
games — in this case boardgames — by appending the term
.data_list to it.
The game information can then be used as it would for other data sources.
A collection of games, linked to a BoardGameGeek user, can also be retrieved by supplying their username, for example:
boardgames = BGG(
    token="ABC123",
    user='BenKenobi1977',
    progress=True)
Data(data_list=boardgames.data_list)
Data Example 8. Filters
This example shows how data, in this case sourced from a “list of lists” — note that filters can be applied to any data source — can be filtered.
lotr = [
    ['ID', 'Name', 'Age', 'Race', 'Stage'],
    [2, "Legolas", 656, "Elf", 3],
    [1, "Galadriel", 8372, "Elf", 3],
    [3, "Aragorn", 88, "Human", 2],
    [10, "Barliman", 62, "Human", 2],
    [4, "Frodo", 51, "Hobbit", 1],
    [5, "Pippin", 29, "Hobbit", 2],
    [6, "Merry", 37, "Hobbit", 2],
    [7, "Samwise", 39, "Hobbit", 1],
    [8, "Boromir", 41, "Human", 3],
    [9, "Arwen", 2778, "Elf", 2],]

Data(
    data_list=lotr,
    filters=[('Race', 'Elf'), ('Age', 700, '>')])
In this example, there are two filters. One for “Race” and one for “Age”.
The “Race” filter only has two values; the name of the column to which the
filter is being applied, and the value being filtered on — Elf.
This is the default filter which is an exact match.
The “Age” filter has three values; the name of the column to which the
filter is being applied; the value being filtered on — 700; and
the type of filter — > or “greater than” which selects records
with values for “Age” that exceed this number.
The outcome of these filters would be a dataset that looked like:
lotr = [
    ['ID', 'Name', 'Age', 'Race', 'Stage'],
    [1, "Galadriel", 8372, "Elf", 3],
    [9, "Arwen", 2778, "Elf", 2],]
Filters are always applied in the order listed.
Filter types — the third option for each filter — are listed below.
One of “<”, “less than”, “less”, “fewer than”, “fewer”, “lt”: here the value in the record must be less than that supplied
One of “>”, “greater than”, “greater”, “more than”, “more”, “gt”: here the value in the record must be greater than that supplied
One of “<>”, “!=”, “not equal”, “not”, “ne”: here the value in the record must be not the same as that supplied
One of “=”, “==”, “equals”, “equal to”, “eq”: here the value in the record must be the same as that supplied
One of “~”, “in”, “is in”, “contains”: here the value in the record must contain, or be a partial match to, that supplied
Although far more comprehensive filtering could be developed, its probably best to do that in your original data source; tools like Excel or Open Office have very sophisticated options to filter and extract data.
The Matrix Command
The Matrix command uses these properties to create data:
data - these are all relevant data that needs to appear on the cards; specified as a “list of lists”; where each nested list contains all data of a specific type of value
labels - a list with one label for each of the other nested lists
This command will generate a dataset for the cards, based on all combinations of values in a “list of lists”; so for this Matrix’ set of data:
Matrix(
    labels=['INITIAL', 'NUMBER', 'LETTER'],
    data=[
        ['A', 'B', ],
        ['1', '2', ],
        ['x', 'y', ],
     ])
There are 8 possible data combinations: A-1-x, A-1-y, A-2-x, A-2-y, B-1-x, B-1-y, B-2-x, and B-2-y and therefore eight cards in the deck.
See the Data Example 3. Matrix above for a full Matrix.
Countersheet and Counter Commands
These commands are effectively “wrappers” around the Deck and Card commands (respectively) so all of the properties and abilities of those commands can be used via these instead. The only real difference is that the default size of a Counter is 1” square (2.54 cm x 2.54 cm).
The aim of having these commands is to allow the script to be more informative as to its purpose and use.
Hint
For an excellent guide on how to create counters for a “traditional” hex-and-counter wargame, see “Creating Wargames Counters with Inkscape” at https://github.com/jzedwards/creating-wargames-counters-with-inkscape ; although its “grammar” is specific to Inkscape, the principle and approach can be adapted to protograf
Supporting Commands for Cards
The following commands are helpful in terms of increased flexibilty and reduced repetition when designing a deck of cards.
group function
The group() function provides a “shortcut” way to reference a set of
shapes that all need to be drawn together.
Add the shapes to a set i.e. comma-separated names wrapped in curved
brackets — (..., ...) — and assign the set to a name.
The shapes are drawn in the order listed in the set (not the order in which they appear in the script!).
For example:
line1 = line(x=0.8, x1=5.6, y=7.1, y1=8.4)
rect1 = rectangle(x=0.7, y=7.0, width=5, height=1.5)
stack = group(rect1, line1)
When this group named stack is assigned to a card and then drawn, the Rectangle will be drawn first, followed by the Line, following the order in which these appear in the group’s set.
This approach is somewhat similar to the Common command, which provides a way to group commonly used properties, except that for that command, the order of items does not matter.
T(emplate) command
The T() command causes the name of a Data()
column to be replaced by its equivalent value for that card.
To use this command, simply enclose the name of the data column in curly
brackets - "{{...}}". Remember that this name is case-sensitive.
This example shows how to use the command, with reference to the Data
from Data Example 5. Lists.
The text, which will appear at the bottom of all of the cards, is derived from the Name column:
Card("all", text(text=T('{{Name}}', x=3.3, y=7.5, font_size=18))
Data from the column can also be mixed in with other text or values, for example:
power = text(
    text=T("""
       <p style="text-align:center; font-family:Helvetica">
       <i>Long-lived</i> <b>({{ Age or '\u221E' }})</b>
       </p>"""),
    x=1.4, y=0.7,
    height=1, width=3.5,
    html=True, fill=None)
Here the text incoporating the value of the Age column uses the
capabilities supported via html=True to style the text - italic and bold.
The or option is used inside of the T() command {{ }} to provide
an alternate value — in this case the infinity sign — for use when
there is no Age value (for example, for the “Gandalf” row).
The full code for this example is available as cards_rectangular.py
Hint
If the column name you use in the T() command does not appear in
any the actual column names, you will get an error such as:
FEEDBACK:: Unable to process data with this template ('Ag' is undefined)
Template String Changes
While, in general, protograf operates under the assumption that the data
provided to it can be used “as is”, it might be the case that sometimes you
want to alter the text provided to the T() command in some way.
There are a number of built-in functions available that can help with this:
capitalize() - Converts the first character to upper case
lower() - Converts a string into lower case
strip() - Removes spaces at the beginning and at the end of the string
title() - Converts the first character of each word to upper case
upper() - Converts a string into upper case
replace() - Replaces a string with another string
zfill() - Fills the string with a specified number of 0 values at the beginning of the string, if it is shorter in length than the number
lstrip() - Removes any leading characters; a space is the default leading character to remove, but the lstrip() can use any characters provided
rstrip() - Removes any trailing characters; a space is the default leading character to remove, but the lrstrip() can use any characters provided
Template String Change Example
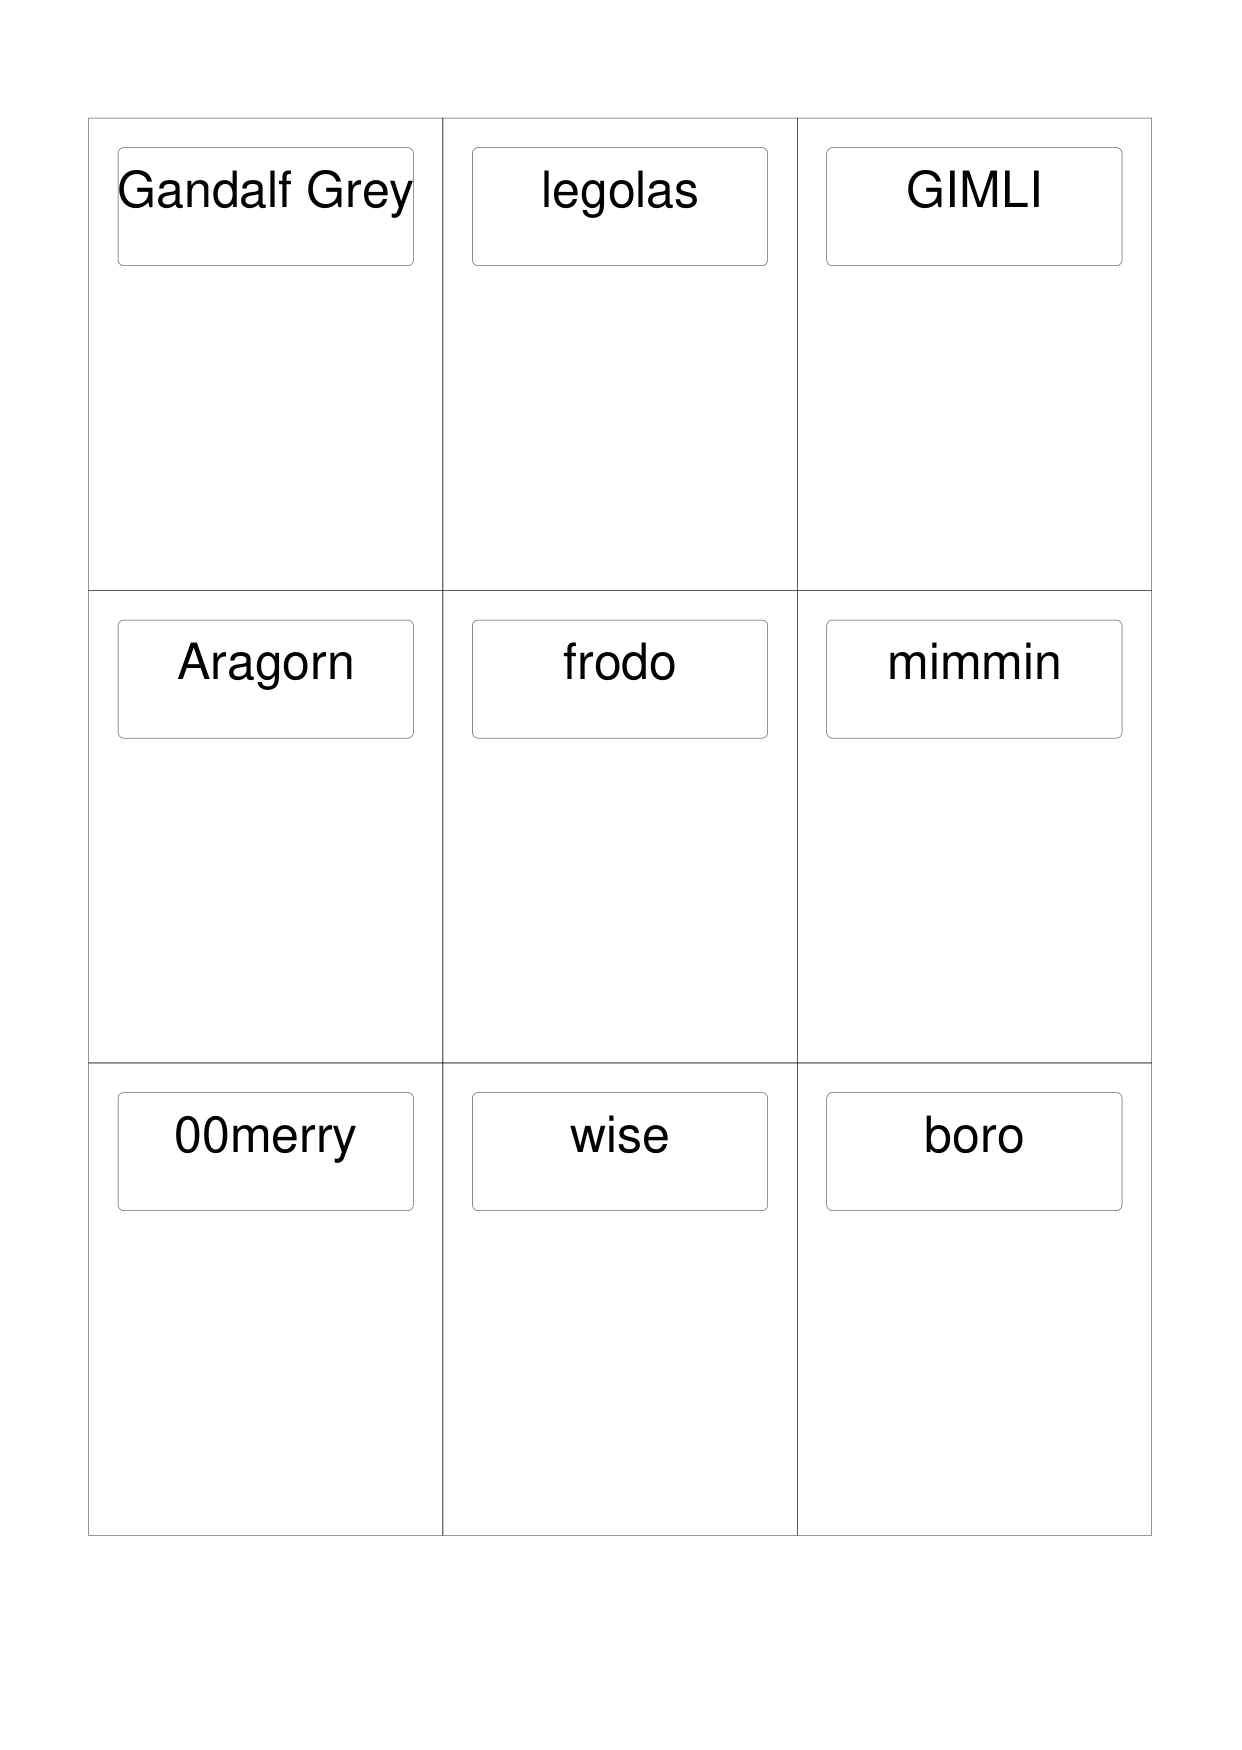
|
This example shows the definition of a deck for some small cards, and illustrates using built-in functions to alter the orovided text for a card. Create(filename='cards_lotr.pdf',
paper="A6",
margin=0.75, margin_top=1)
# deck data
lotr = [
['ID', 'Name', 'Age', 'Race', 'Copies'],
[1, "gandalf grey", None, "Maia", 1],
[2, "LEGOLAS", 656, "Elf", 1],
[3, "gimli", 140, "Dwarf", 1],
[4, "aragorn", 88, "Human", 1],
[5, "frodo ", 51, "Hobbit", 1],
[6, "pippin", 29, "Hobbit", 1],
[7, "merry", 37, "Hobbit", 1],
[8, "samwise", 39, "Hobbit", 1],
[9, "boromir", 41, "Human", 1],
]
Data(data_list=lotr)
# design deck
Deck(cards=1, height=4, width=3)
# character name
name_box = rectangle(
x=0.25, y=0.25,
width=2.5, height=1,
rounded=0.1)
chn = Common(x=1.5, y=0.75, font_size=12)
Card("*", name_box)
Card("1",
text(text=T("{{ Name.title() }}"),
common=chn))
Card("2",
text(text=T("{{ Name.lower() }}"),
common=chn))
Card("3",
text(text=T("{{ Name.upper() }}"),
common=chn))
Card("4",
text(text=T("{{ Name.capitalize() }}"),
common=chn))
Card("5",
text(text=T("{{ Name.strip() }}"),
common=chn))
Card("6",
text(text=T("{{ Name.replace('p', 'm') }}"),
common=chn))
Card("7",
text(text=T("{{ Name.zfill(7) }}"),
common=chn))
Card("8",
text(text=T("{{ Name.lstrip('sam') }}"),
common=chn))
Card("9",
text(text=T("{{ Name.rstrip('mir') }}"),
common=chn))
|
Template Functions
It could that you need to perform a more complex operation, or validation, on the data returned by the template from the Data().
In this case, you can write a Python function which can be used to generate one or more shapes to be drawn on the card.
The function should accept one incoming value; the incoming data for this
value will be that created by the T() command.
The function should return one or more shapes; anything else will trigger an error.
For example, if the function was called icon_list and it returned a
number, then this error would be displayed:
FEEDBACK:: Check that all elements created by 'icon_list' are shapes.
The name of the function is then passed to the T() command by that
command’s function property.
Template Function Example 1.
In this example, the function is called greet, and is assigned and used
by the T() command as follows:
def greet(data):
    greeting = 'Hi ' + data
    return text(text=greeting, x=1, y=1)

greetings = T('{{Name}}', function=greet)
Card("*", greetings)
Here the value extracted from the Name column of your data file is
provided to the function you have called greet and assigned to it’s
data property.
The function simply creates a new text value called greeting and uses
that in a Text() shape which is then returned by the function.
The Text() shape is then assigned, via greetings to one more cards in
the usual way.
Template Function Example 2.
Here is a more complex example involving deeper knowledge of Python Commands; please skip it if the terminology or grammar makes no sense!
If you had a data value containing a list of image names (say they are separated by commas) that need to be drawn in a line on the card, then you will need a function that will split those names and create a list of Image() shapes laid out in a line.
The approach could be:
def make_images(data):
    all_icons = split(data)  # create a list of individual icons
    icon_list = []  # create a place (a list) to store Images
    start = 0  # set distance away from start
    for icon in all_icons:  # step through icon list
        icon_image = image(icon, x=0.5 + start, y=2)  # create Image
        icon_list.append(icon_image)  # add image to the list
        start = start + 0.5  # increase distance for next icon
    return icon_list

icons = T('{{Icons}}', function=make_images)
Card("*", icons)
The key point here is that the make_images function generates a list of
shapes that are provided for use in the script by the return.
S(election) command
The S() command causes a shape to be added to a card, or set of cards,
for a matching condition.
There are two properties required:
the first is the condition that must matched, enclosed in curly brackets
"{{...}}"the second is the shape that will be drawn if the condition is matched
The match condition contains three parts, all separated by spaces:
the column name being checked — this is case-sensitive
the test comparison being used, e.g.:
==for equal to;!=for not equal to;>for greater than;<for less than;into check if text is contained in other text (see example below)
the value being checked - for example, a number or some text — this is also case-sensitive
This example shows how to use the command, with reference to the Data
from Data Example 5. Lists:
back_race = Common(
    x=0.5, y=0.5, width=5.3, height=7.9, rounded=0.2)
back_hum = rectangle(
    common=back_race, fill_stroke="tomato")
Card("all", S("{{ Race == 'Human' }}", back_hum))
In this example, for any/all cards for which the Race column is equal
to — the double equals (==) comparison — the value Human,
a red rectangle, named back_hum, will be drawn on that card(s).
Note that the in check can be used in reverse. So:
back_race = Common(
    x=0.5, y=0.5, width=5.3, height=7.9, rounded=0.2)
back_hum = rectangle(
    common=back_race, fill_stroke="tomato")
Card("all", S("{{ 'H' in Race }}", back_hum))
Here any/all cards for which the Race column contains a capital “H”
will have a red rectangle, named back_hum, drawn on them.
A “nonsense” condition is usually ignored; for example:
Card("all", S("{{ nature == 'Orc' }}", power))
will produce no changes in the cards as there is no nature column or Orc value.
The full code for this example is available as cards_lotr.py
L(ookup) command
The L() command enables the current Card to retrieve data from a named
column corresponding to another Card based on the value of a named column
in the current Card.
It takes three properties which correspond to the names of the three columns (remember that these names are case-sensitive):
the first column name is one that must contain a value for the current card;
the second column name is one that is used to find a matching card whose column must contain a value that matches that of the one appearing in the current Card
the third column is the one that will return the value for the matched Card.
As an example, suppose a CSV file contains data for these two cards:
ID, NAME, USES,   IMAGE
1,  wire, copper, wire.png
2,  plug, wire,   plug.png
This example shows how to retrieve the IMAGE for the “wire” card when working with the second (“plug”) card:
Card("2", image(source=L('USES', 'NAME', 'IMAGE')))
The program takes the value from the plug’s USES column; then finds
a Card whose NAME column contains a matching value — in this case,
the card with ID of 1; and then returns the value from that card’s
IMAGE column — in this case, the value wire.png.
Card Functions
It could be that you need to perform a more complex operation, or validation, on any or all of the data assigned to a Card or Cards.
In this case, you can write your own Python function which can be used to generate one or more shapes to be drawn on the card.
The function should accept one incoming value; this will hold the data associated with a card — for example, the row of data in a spreadsheet. The function can then work with this data.
Important
The function should return a shape, or a list of one or more shapes or an empty list — anything else will trigger an error!
For example, if the function was called icon_list and it returned a
number, then this error would be displayed:
FEEDBACK:: Check that all elements created by 'icon_list' are shapes.
The name of the function is assigned directly to the Card in the same way that shapes, or template functions, are usually assigned.
Hint
It can be useful to treat the Card as a “small page”, and make use of other layout commands — for example, Repeat or Layout — to compose shapes on a card. Such commands will require that you position them relative to a top-left corner; by default this is the page corner, but you can alter this via a reference to the Card’s corner by making use of the card geometry.
Card Function Example 1.
In this example, the function is called greet, and is assigned and used
by the Card() command as follows:
def greet(data):
    if data.Birth < 1977:
        greeting = 'Hi ' + data.Name
    if data.Birth >= 1977:
        greeting = 'Well, hello there ' + data.Name
    return text(text=greeting, x=1, y=1)

Card("1-3", greet)
A card’s data is accessed by the use of the “.” (dot) notation; in this
case the value of the Name column for the card is accessed by using
data.Name and the value of the Birth column for the card is accessed
by using data.Birth. This example assumes that you have text values
for Name and numeric values for Birth.
The function makes use of a Python if switch to choose
different greeting values depending on the Birth value. The text
created is then returned by the greet function.
The Text() shape created by greet is then assigned to the first
three cards in the usual way.